Author: Brewing Solutions

  • All That You Need to Know about Designing the Perfect Label for your Craft Brews

    All That You Need to Know about Designing the Perfect Label for your Craft Brews

    Get your Brews Flying off the Shelves with a Stunning Design

    You may have brewed the perfect beer. But, if your marketing is lacking, then the world will not know about your creation. Check out the first part in the series, about making your craft brews give the big name brands, a run for their money.

    Come on, don t be shy. Say it aloud – you know your beer is better than the big brands out there. Now, it’s time to convince others of it. Getting strangers (especially beer aficionados) to try your brew is a lot harder than getting your friends and family to sip it.

    You’re going to need a captivating and stunning label for your beer.

    If you’re into craft beer production or wondering if you should get started, let’s first congratulate you-you’re in one of the most profitable industries right now. According to a survey by the Brewer’s Association, craft brewing is quickly emerging as one of the most profitable and viable industries right now.

    With that said, let’s agree that small brewers don’t know marketing (or do they have a huge marketing budget) as much as they know their hops, yeast, and fermentation. Here, on our blog, we seek to address this. Over the next few weeks, we’ll give you some great tips, tricks, and strategies to up your marketing game. In no time, you’ll be competing with some of the big names out there.

    Today, we show you how to create the perfect beer labels for your brew. Without further delay, let’s get started.

    Figure out your Brand’s Personality

    As Socrates said, “Know Thyself,” we believe that any successful brand must know itself. If this sounds philosophical, let us break it down in simple terms for you – know where your brand stands in the market.

    Here are three key questions, you have to ask yourself:

    • What is your product? What is its USP?
    • Who is your target customer?
    • How do you sell your product? What are your sales channels?

    Start by identifying what type of beer you’re selling – a lager or ale? What’s the style of your beer? And, think of one solid reason why people should try your beer over others?

    The next step is identifying your target customers. Remember, you cannot satisfy every single beer drinker out there. Instead, of trying to please everyone, focus on exceeding the expectations of a small, select group.

    The final step is to identify how your target customers buy your product. Do they go to a local beer pub, or can they order it online?

    Finding the answers to these questions will help you identify and develop the personality of your brand. It will help you shortlist what you want to convey via your beer label.

    Once you’ve fleshed out the personality of your brand, the next step is to put it down in your label.

    Designing the Beer Label

    Your beer label is one of the first impressions you make on your customers. While knowing the personality of your brand is the first step, the next important step is to translate that personality in your label.

    Choosing the Label Styles

    Full Wrap Beer Bottle Label

    This is a large rectangular label that wraps around the entire middle surface of the beer bottle. This is a good choice if you have plenty of information to include on the label. Wondering what you should print on your label? Here are a few ideas to help you out:

    • Ingredient list
    • Taste profile
    • Explain the story that inspired the beer
    • The story of how your brand came into existence
    • Manufacturing / Expiry date

    Half Wrap Beer Bottle Label

    Are you someone who loves to keep it crisp and short? Then, a half wrap beer bottle label is perfect for your brand. It has sufficient space to print your logo and other information required by law, without being superfluous. This label covers only one side of the bottle, thereby letting the brew taking center stage.

    Get your consumers to see the rich colour of your brew while saving the cost of printing a full-sized label that covers the entire circumference.

    Beer Neck Label

    If you feel that the neck of your beer bottle is empty, then you can opt for this style along with any one of the previous two styles.

    On the other hand, if you’re looking to stray away from the norm and make your bottles look different, then opt just for the beer neck label. It’s minimalistic and works great, especially when you have an attractive beer bottle or a cool looking brew. The beer neck label lets you focus on what matters most – your beer.

    Choosing the Shape of your Label

    Rectangle, square, trophy, circle – the options available for your beer bottle label shapes are aplenty. Let’s take a look at the different label shapes and their impacts:

    Square and Rectangle Labels

    These are the most common label shapes – they are mostly the standard. Even if your labels are standard, round or square the corners, to give it a subliminal twist.

    Sharp Corners – Also known as cusps, these evoke feelings of strength, stability, and power. If your beer has a strong, intense flavor, then sharp corners help you convey that message.

    Round Corners – Rounded corners stand out in the world of sharp edges. If your beer has a fruity or light flavor, then rounded corners work better.

    Triangle Labels – These are another modern choice for your beer labels. They symbolize sharpness, balance and are perceived as energetic and dynamic. If your beer has some interesting and unique flavours, then using triangle labels is a great choice.

    Circle and Oval Shapes – Both these shapes symbolize timelessness. They are a great choice if your beer has a unique flavor, out of the ordinary.

    Other Shapes – Other alternative shapes include hexagons, scallops, hearts and more.

    Choosing the Material for your Beer Label

    Once you have finalized the shape and style of your beer label, the next step is to pick a suitable material. Since beers are traditionally kept cold, in a refrigerator or on ice, you need to look for waterproof labels that don’t tear easily. The finish of the label can be – matte, gloss, polyester, and so on.

    Final Thoughts

    Now, that you’ve decided on the physical aspects of your beer label, in the next post, we’ll take a look at the design, colour, style, and typography of the label. Remember that if you need your brews flying off the shelves, then you need an awesome label! Till then keep sipping on your favourite brew!


  • Is Beer Going to Get Extinct

    Is Beer Going to Get Extinct

    The Surprising and Saddening Impact of Climate Change on Beer

    According to a recent report presented at the United Nations – Climate Change is very real and is sure to cause catastrophic changes in the foreseeable future. Flash floods, extreme heatwaves, increased poverty – are about to become the order of the day.

    If that hasn’t got you scared – then, we’ve got something that strikes a chord with all your fellow beer lovers out there.

    According to a recent study published in Nature.com, the production of the world’s best-selling alcoholic drink is about to be significantly impacted by climate change.

    Wondering WTH does Climate Change have to do with your Beloved Beer?

    Impact of Climate Change on Barley Production & Yield

    Well, let us explain. As you beer aficionados know, barley is one of the four main ingredients (the other three being water, yeast, and hops) is a crop that is extremely sensitive to heat and drought. The study had a team of international scientists collaborating to determine the impact of barley scarcity on beer availability and pricing, in the coming years.

    The scientists used advanced computer models to predict future outcomes. They used various scenarios to create a range of results. The worst-case scenario is that carbon-di-oxide emissions and fossil fuel consumption continued at the same levels throughout the rest of this century.

    The detailed results of the study were published in Nature Plants. Perusing the gist of the study, one can find that the future isn’t all that good for beer lovers.

    If the above mentioned severe climatic events were to occur, the yields of global barley crops could drop by a whopping 17%. When barley production drops, beer prices are sure to increase. In some cases, they can even double, which is predicted to drop beer consumption by 16%.

    Even if industries, nations and the entire world were to wake up to the effects of climate change and reduce carbon-dioxide emission and fossil fuel consumption, barley would still bear the brunt of even modest climate change.

    In the mild global warming scenario, barley yields could still drop by 3% causing beer consumption to fall by 4% and the prices to increase by 15%.

    In the Global Scheme of Barley Consumption – Beer isn’t at the Top

    Just a minor quantity of the overall global barley yields – around 17% – is used for making beer. The rest of the barley is mainly used to feed livestock. If barley supplies were to reduce, then the priority would be using the grain to feed animals and putting beer production on the back burner.

    Impact of Climate Change on Barley will hit Different Nations Differently

    For instance, in Australia, climate change could be a boon. Higher temperatures could make it easy to cultivate barley in some regions. On the contrary, regions like Central Africa, South America, and Central America would be the most hit by climate change.

    Similarly, fluctuations in beer prices will also vary depending on the region. Developed and wealthy nations that consume the higher beer per capita will be the ones most hit by the price rise.

    Ireland is one of the top nations with high beer consumption per capita and the study states prices in Ireland could shoot by a whopping 338% per bottle. On the other hand, in countries like China where the per capita income is way less, the increase in beer prices could lead to a massive reduction in beer consumption.

    Impact of Climate Change on Water Used in Making Beers

    That the world is rapidly approaching a water crisis is no new news. Remember the zero-day, in Capetown earlier this year? By the year 2025, around 1.8 billion people will face absolute water scarcity and a major portion of the rest will live under “water-stressed” conditions.

    With water scarcity, people will be forced to make significant shifts in the way water is used. The recent water crisis in California meant that craft brewer had to come up with innovative solutions like – making beer from recycled water, digging new wells in the towns, where their breweries are located and so on.

    Impact of Climate Change on Hops

    A few experts predict that the biggest disaster to beer because of climate change will be to hops and not barley. Since hops are not a consumable crop, it will be dropped down the priority list, when the earth becomes hotter and drier.

    Even now, the prices of hops have skyrocketed especially for highly popular varieties like Cascade. This doesn’t mean your favorite brew won’t have flavors like floral, bitter and so on. But, it just means that these flavors will come from other ingredients like gruit and not hops.

    Additionally, one of the best benefits of hops is that it’s more than a flavoring agent. It also acts as a preservative. So, when beers lose hops, they are likely to get more synthetic preservatives.

    Impact of Climate Change on Yeast

    Yeast is one of those micro-organisms that are pretty hard to kill. Climate change will not have much of an impact on yeast, and it will continue doing what it does – eating sugars, releasing gases and converting sugars into alcohol.

    Final Thoughts

    As you can see, climate change is not something that belongs to a far-distant future. But, it’s here and is causing major drawbacks in all aspects of life – including your favorite brew!

    When we speak of climate change, people often fail to look at the personal impacts. Melting polar ice caps, rising sea levels all seem and feel like far-off threats that have no impact on our day-to-day lives.

    But, small changes don’t happen at once. Instead, they tend to sneak upon us. For instance, now a hoppy beer may cost a few bucks extra. But, these little changes keep on piling. And, a decade from today, you may be shocked to find that an IPA or witbier costs double of the other beers, or they may even stop existing.

    If we don’t pay attention right now, some of our finest beers will slip away from us. Sure, climate change has far bigger impacts like the planet dying, but then, we’re getting off track. For us, here, it’s all about the beer!

    Isn’t it time, that we all wake up to climate change and demand the right actions from our policymakers and governments? If not for other reasons, at least to preserve our favorite drink?

  • Don’t Get (Bottle) Bombed – Smart Tips to Avoid Disasters on Bottling Day

    Don’t Get (Bottle) Bombed – Smart Tips to Avoid Disasters on Bottling Day

    Did you hear something in your storage room? Wondering if you’ve got a hoard of mice running around? You grumble and head down to your storage room to investigate, only to come across a shocking mess – broken bottles all over and spilled beer on the floor!

    What could have gone wrong?

    You have just witnessed the dreaded beer bomb aka beer bottles exploding due to an increase in pressure. So, what went wrong? There are a few plausible explanations – you bottled early, too much priming sugar or your beer could have been a victim of aggressive yeast infections.

    The first thing is – what should you do now? You have two choices before you – try saving the remaining beer, or clear out the place if it’s gone too far.

    Before, you proceed any further,

    Here’s a Note of Warning

    Bottle bombs are dangerous. If one bottle in a batch has exploded, the rest of the bottles in the batch should be treated immediately. There’s no way to know if another bottle from the batch will blow up. So, whether you plan to salvage the remaining beer or you want to dispose of the entire lot, you need the right safety gear before you proceed.

    Wear safety glasses that cover your eyes from all sides. Face shields are better as they protect your face completely. Leatherwork gloves, heavy jackets are other accessories you need. And, don’t touch a bottle with your hands. Instead wrap it in a towel or a canvas bag, while disposing of it.

    Follow this Step-by-Step Guide that Helps You Tackle the Situation Safely

    • Wear your safety gear.
    • Select a couple of bottles at random and wrap them in a towel.
    • Place the remaining bottles, temporarily in cases, where they won’t cause any disturbance.
    • Chill the randomly chosen bottles in a refrigerator for a few hours. This helps to relieve the pressured and dissolve some CO2 back into the solution.
    • Once the bottles have cooled down, take them outside and open away from your body, one at a time. The beer inside may gush out and make a huge mess.
    • Here’s what to look for:
      • If the bottles have different reactions, then it indicates a few of the bottles may have contracted a yeast infection, or the priming sugar may not have mixed properly. You’ll have to check each bottle separately.
      • If all the bottles are over-carbonated, then open a few and taste the brew. If they taste bad, then it indicates a yeast infection, and you’ll have to dispose of the entire lot. If the brew tastes okay, then you can relieve the pressure of all bottles and try to salvage at least a portion of the batch.

    Coming to the big question,

    Are there any Ways to Avoid the Dreaded Beer Bottle Bomb?

    Here are a few tips to help you.

    Tip #1: Invest in High-Quality Ingredients

    It’s true that brewers today have access to a wide variety of high-quality ingredients. It pays to be cautious while choosing ingredients, especially when you come across ingredients that look like they’ve been sitting on the shelf for a while and are about to expire.

    Here are a few guidelines to help you out – Always use fresh malts. Older dried or liquid malt extracts ferment slower compared to the all-grain wort. Also, remember that yeast comes with an expiry date. Liquid yeast is generally higher quality compared to dry-yeast packs.

    However, liquid yeasts require storage in a refrigerator and come with a shorter shelf life. Remember to use liquid yeast before the expiry date and also pay attention to the date, while shopping for liquid yeast.

    One of the main reasons for bottle explosions are old, expired yeast that ferments slowly or incompletely.

    Tip #2: Let the Beer Ferment Completely before You Start Bottling

    Another main reason why beer bottles explode is that beer is bottled before the fermentation is complete. Very often, beginner brewers are anxious to try out their latest brews. So, in a hurry, they start bottling it too early.

    The beer continues to ferment inside the bottle, generating extra carbon-di-oxide, which has nowhere to escape. This causes an increase in the pressure inside the bottle, causing it to explode.

    A beer that uses malt extracts ferment slower compared to an all-grain beer. So, if you’re using malt extract, pay extra attention and ensure that fermentation is complete before you begin bottling.

    Another reason is most brewers who use malt extracts use plastic buckets with weak seals. As a result, the gas leaks out from the edge of the bucket, instead of the airlock. Beginner brewers often assume that since there’s no airlock activity, fermentation is complete. However, they fail to notice that fermentation is still happening.

    The general rule of thumb is to wait for two weeks for the fermentation to complete fully before you start bottling. If you’re brewing a high gravity beer, then you’ll have to wait longer.

    Tip #3: Use Good Bottles and Inspect your Bottles Carefully before Bottling

    Using poor quality bottles is inviting disaster. Very often, brewers in an attempt to cut overhead costs use cheap bottles of poor quality. This is a costly mistake.

    Even under regular carbonation, the pressure inside a beer bottle can reach up to 30+ psi. You need a bottle that can withstand the pressure generated. Stay away from twist-off bottles – that are too thin, and don’t properly seal.

    Always choose thicker bottles. Clean the bottles thoroughly, and inspect it before bottling. Place the clean bottle in front of a light source to check if you can spot any impurities. If you notice any cracks, chips (however thin they may be), don’t use those bottles.

    It always makes sense to invest in high-quality reusable bottles, instead of a one-time use of cheap ones. The high initial costs are usually offset since you use these bottles again and again.

    Tip #4: Use the Right Amount of Priming Sugar

    Sugar density plays a crucial role in the carbon-di-oxide generated. The same type of sugar has varying densities based on the manufacturer. For instance, one cup of corn sugar from manufacturer A may vary dramatically compared to the same quantity of sugar from another manufacturer.

    Always weigh your priming sugar. Don’t measure using volumes. Make sure that you’re using the right amount of priming sugar needed for your recipe.

    Tip #5: Store Bottles in a Cool, Dark Place

    Heat and Light are mortal enemies for finished beer. When exposed to heat and light, the critical flavor compounds in your beer break down, promoting additional fermentation, thereby increasing the carbon-di-oxide generated. This increases the pressure inside the bottle, causing it to break down.

    Heat expands the gas inside the bottle thereby increasing pressure, which in turn, leads to the bottles exploding.

    Always remember to store finished beer in a cold, dark place not only to avoid bottle bombs but also to preserve the natural flavor of the beer.

    Summing it up

    Beer bottle bombs are a part of the learning curve. Make sure to use this guide to help you avoid exploding bottles. If you found this article helpful, don’t forget to share it among your brewer friends. Have you seen a beer bottle explode? Was it scary or fun? Share your experiences in the comments below.

  • Top Mistakes that all Newbie Brewers Make (And Ways to Avoid Them)

    Top Mistakes that all Newbie Brewers Make (And Ways to Avoid Them)

    Throughout your journey of brewing beer, right from brewing your first stout to tinkering with special styles, you’re bound to make mistakes. Worry not, mistakes are inevitable and happen even to the best brewers.

    Plainly speaking, making mistakes is a sign that you’re learning something new. Mistakes provide you an opportunity to refine and widen your knowledge about the brewing process. With that said, brewing is an expensive and time-consuming affair, and no one wants to keep on making mistakes along the way.

    Fret not, fellow brewers! Here, in this week’s post, we give you some of the top mistakes made by beginners and also show you ways to avoid them. As a wise man once said, “Regular people learn from their mistakes, while smart men learn from the mistakes of others.”

    So, check out these mistakes made by newbies and find out the solutions to avoid making them.

    Too Much, Too Soon

    Trying to brew a difficult batch or aiming to brew a large batch is a sure-fire recipe to disaster. Excited beginners often set their sights too high. The result – they end up feeling frustrated and disappointed.

    The solution – Start with a simple recipe and a small quantity. Make sure to read the recipe a couple of times, get all the required ingredients and equipment on hand, before you begin. There’s nothing as frustrating as finding midway that you’re missing a vital ingredient.

    Remember, don’t go too fast. Start slow, perfect your techniques, and then increase your scale. Patience is indeed a virtue.

    Skipping Cleaning and Sanitization

    Very often, new brewers skip the equipment cleaning process. This is a costly mistake. Proper cleaning and sanitization play a vital role in the brewing process.

    Dirty surfaces and hands, dusty equipment all increase the chances of introducing bacteria to your brew, thereby increasing the chances of spoiling it.

    Even expert brewers are meticulous about cleaning their brewing equipment throughout the process. Make sure to use the right cleaning or sanitizing solution to ensure that your equipment is spotless and clean. If your brewing equipment is scratched or damaged, then make sure to replace it immediately.

    Remember that even a small amount of contaminant will impact the overall flavor, color, and clarity of your brew.

    Failing to Use Pure Water

    This cannot be emphasized more. Water, though – the simplest and cheapest ingredient – is the most important one for brewing. Yet, most brewers use regular tap water.

    The water you use for brewing plays a major role in the taste and quality of the brew. Here, let me give you a comparison. Water is the blank canvas, on which you paint your brew. Tap water isn’t a blank canvas, as it has chlorine, fluorine and other chemicals as well as contaminants all of which affect the final output.

    Solution – Use RO purified water as it’s free from all chemicals and contaminants.

    Skipping Instructions

    All expert brewers have one thing in common – their love for precision. Brewing is a science, and you’ve got to get the measurements and procedures right for the perfect results.

    Yes, we agree that there’s a bit of trial and error involved in brewing. But, that happens later once you have mastered the basics.

    When you’re starting, you have to pay special attention to – measuring ingredients, reading instructions carefully, and the following everything to a T.

    Forgetting Temperature Control

    Temperature control is an essential component of brewing quality brews. Very often, beginners fail to monitor temperatures during the brewing process (especially during fermentation). If the room is either too hot or too cold, then fermentation can take a hit. When the temperature increases excessively, it can lead to over-sweet brews or increase the alcohol content of the beer.

    The solution – Invest in a high-quality thermometer. Make sure to check the ideal temperature for your specific strain of yeast. It’s often printed on the back of yeast packaging. Also, don’t forget to monitor the wort while it cooks. If it’s overcooked, it can create a huge mess.

    Unreasonable Expectations

    Remember that brewing is not magic. You cannot expect to brew a stellar batch on your first attempt. And, don’t set high expectations.

    Bad batches happen, and it’s all part of the learning curve.

    The Solution – Make sure to document your process. This way, you’ll know where you have gone wrong and refine it in the next attempt.

    Selecting an Advanced Recipe

    Yes, that exotic beer is all that you dreamed of. But, this isn’t the time to try it. While you’re starting, it could be quite tempting to try everything at once. This is a costly mistake.

    The solution – Make sure you stick to simple tried and tested recipes until you get the hang of the brewing process. And, when you’re ready to experiment, make sure that you play around with just one ingredient at a time, instead of changing everything at once.

    Taking Shortcuts

    When it comes to brewing, there are no shortcuts. You cannot try to save time or resources by skipping steps or ingredients. It doesn’t work that way.

    Don’t skip cleaning and sterilizing. Wait until the wort cools completely. Measure your hops accurately. Siphon carefully – the list goes on.

    If you try to cut corners, then your results are sure to reflect that!

    Final Thoughts – Mistakes Happen. The practice is what Makes it Perfect.

    Successful brewing comes down to patience, following the instructions, using the right ingredients and above all, willingness to try and try again. Make use of all the resources available to you.

    Our weekly blog posts are a good place to begin. You can find plenty of tutorials as well as answers to your queries about brewing. If possible, join a brewery club near you.

    Above all, don’t lose heart if you don’t get it right on the first attempt (or even the tenth). Success is just around the corner, and your best batch of beer is waiting to happen!

    Cheers!

    For the best brewing equipment in India or any further help on setting up your brewery don’t hesitate to get in touch with one of us, here at Microbrewery India.

  • Have you Mastered the Art of Working with Different Types of Sugars in Brewing?

    Have you Mastered the Art of Working with Different Types of Sugars in Brewing?

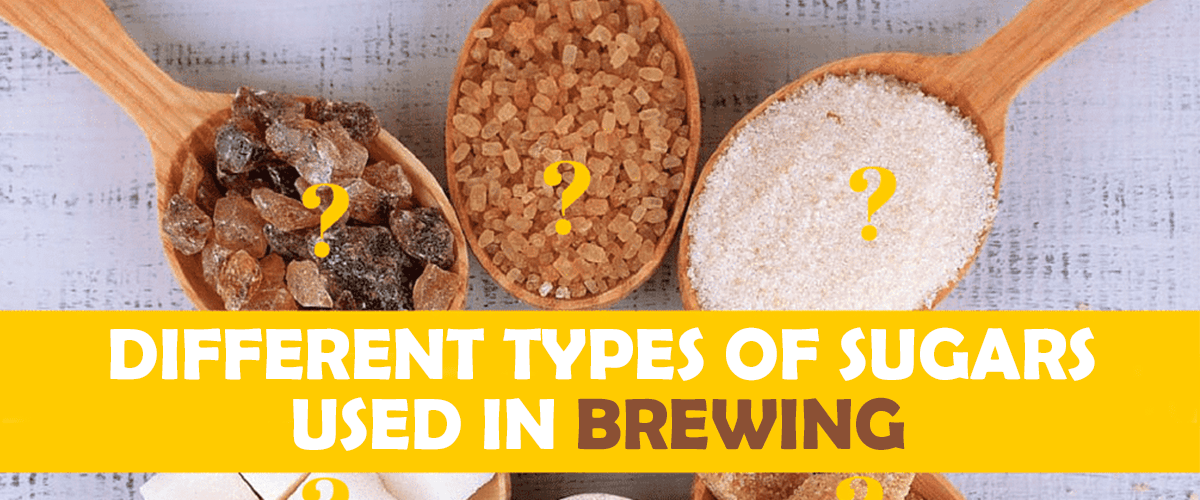
    Glucose, sucrose, fructose, maltose, verbose and more – sugar is sugar, ain’t it? While that may be true for others, brewers need to have an accurate knowledge of the different types of sugars and how it impacts the flavor of the brew.

    Here, in this guide, you can find all the answers to your queries about the different types of sugars used in brewing. We cut to the chase and give you clear-cut answers to all your sugary questions.

    Before, we get into the actual role of sugar in brewing, here’s the general break down of different types of sugars.

    • Glucose

    Derived from starch, glucose undergoes quick fermentation. In the brewing world, glucose is commonly referred to as “dextrose.”

    • Lactose

    Derived from milk, lactose has a sweet flavor and is non-fermentable if using yeast. However, it undergoes fermentation with certain strains of wild yeast. Adding lactose to stouts form “milk stouts.”

    • Maltose

    Naturally occurring in malt, maltose undergoes slow fermentation.

    • Sucrose

    This is another sugar found in malt. It undergoes rapid fermentation with beer yeast.

    Now, that you know the basic types of sugar, let’s take a look at its role in brewing.

    Gravity Vs. Fermentability

    While adding sugar to your brew, one of the first questions you have to address is whether the sugar you’re adding contributes to the flavor, body or alcohol content of the brew. (Sometimes it’s all three).

    Not all sugars are the same. Generally, they can be divided into the following four types:

    • 100% fermentable
    • Mostly fermentable
    • Partially fermentable
    • Unfermentable

    100% Fermentable Sugars

    Most of the commonly used sugars are completely fermentable. Adding this type of sugar to your brews will add to the gravity points. This is because every gram of sugar you add to the brew gets converted by the yeast into alcohol. Examples of 100% fermentable sugars include – table sugar, maple syrup, Belgian Candi syrup, and corn syrup.

    These sugars don’t add body to the brew. On the other hand, they only thin out the brew. Post-fermentation, the sugars are completely converted into alcohol. They may add some flavor, but don’t add proteins or other types of residual carbohydrates.

    Mostly Fermentable Sugars

    As the name implies, these sugars undergo fermentation ranging from 75% to 95%. Examples include honey, rice solids, and light molasses. These sugars add small but significant amounts of minerals, and proteins to the brew.

    The use of these sugars will add to the potential gravity of the brew.

    Partially Fermentable

    These sugars undergo fermentation as little as 40%. These include black treacle and darker molasses. While it’s true that both treacle and molasses are sugar products, they are both by-products of plant sugars, hence not completely fermentable.

    The darker the product, the higher is the concentration of plant derivatives. This results in more intense flavors and lower gravity points.

    Least Fermentable (in some cases, unfermentable)

    This includes sugars like maltodextrin and lactose. You can consider them as the polar opposites of the 100% fermentable sugars. They add gravity points to the brew but don’t contribute to the alcohol content.

    These sugars are complex products that cannot be fermented by brewing yeasts. While you can add other enzymes to break down these sugars, if left alone, they don’t add to the body.

    Coming to the Big Question – Do all Sugars Taste the Same?

    Tasting sugar before you add it to the brew is a sensible idea. But, how can you be sure that – the pre-fermentation flavor and post-fermentation flavor remain the same?

    The sugar you add is going to undergo a dramatic change in composition. So, what you taste before is going to be totally different from the flavor observed post-fermentation. So, how do you figure out the right sugar based on taste?

    Additionally, you have to remember that the conversion of sugar into alcohol doesn’t remove the entire sweetness. This is because alcohol is sweet along with other flavors like peppery and perfume-like.

    Sugars from a Flavour Perspective

    By adding sugars like candy syrups, cane sugar, rice solids, corn sugar, un-carmelized beet sugars, you don’t add impact the flavor of your brew. While color doesn’t indicate flavor accurately, here’s a rule of thumb – light sugars mean the flavor is minimal.

    Sugars that are highly fermentable like Golden syrup and dextrose add to the ABV but don’t impact the flavor in any way. However, remember that excessive use of sugar could lead to an unpleasant flavor.

    If you’re looking to add flavor, then honey is the way to go. Lighter honey like clover honey adds a mild flavor, while stronger ones like dark buckwheat honey contribute a heavy flavor. However, remember that the flavor imparted isn’t connected to the source of the honey. For instance, raspberry honey tastes nothing like raspberries.

    When it comes to honey, you have plenty of options like meadow-foam honey (marshmallow flavor), Orange blossom honey (floral notes), Tupelo honey (rich, intense flavor) and more.

    Another type of brewing sugar to use is natural syrup (or saps). Some examples include agave syrup, jaggery, maple syrup, birch syrup, treacle, molasses, and more. Remember that darker the syrup, more intense is the flavor.

    Working with syrups is a bit tricky. The key here is to experiment with different flavors and pick the ones that you love.

    Sugar, Sugar, and Sugar Everywhere

    One final note on experimenting with different types of sugars – Remember that the sugar you taste before adding to the brew may be completely different from the final flavor, post-fermentation. However, remember that most sugars are completely fermented, and impart only the subtlest flavors. The key rule of thumb to remember here is “Darker the color, more intense is the flavor.”

    Be bold and experiment with different types of sugars. Brewing is a pretty robust process, and there are minimal chances for you to mess up. And, even if you brew a batch that is undrinkable, no worries, it’s all part of the learning process.

    Go ahead and toss in different sugars, and watch the fireworks. Happy brewing!

    And, for the best brewing equipment in India, you know where to turn. Reach out to us here at Microbrewery India to help turn your hobby into a successful career!

  • The Seven Step Guide to Tasting and Drinking Beer like A Pro

    The Seven Step Guide to Tasting and Drinking Beer like A Pro

    Calling all beer lovers! Sharing with you the secret that will take you from beer novice to beer pro in just under five minutes!

    Think back to the time when you visited your local pub. Chances are that there would have been plenty of different craft beers and you would have had a hard time figuring out which one to pick. We don’t blame you – in fact, small independent craft breweries today represent a major share of the overall beer industry.

    And, thanks to the burgeoning craft brew revolution, there are plenty of choices. Unfortunately, this presents a new problem. We are having a difficult time choosing the right style.

    Worry not guys; we’ve broken down the beer tasting steps into seven easy steps. By the time you finish reading this, you’ll learn all that you need to know to taste beer and appreciate the differences in flavors.

    Here’s our 7-Step Guide to Tasting Beer like a Pro

    Tasting beer today is no more about – popping open the can and chugging it all down. In order, to fully appreciate and enjoy the beer you’re drinking, you need to follow the following steps.

    1. Pour

    It all starts with the pour. Whether you’re drinking beer directly out of the bottle or can, you need to pour it into a glass to fully appreciate the taste.

    To get started, you can use a regular “pint” glass or any standard glass you have at hand. However, if you’re serious about your beer, then we highly recommend that you get started with the right beer glass based on the type of brew you’re drinking. Take a look at our Glassware Guide to pick the right style of glass to choose from.

    1. Look

    Your eyes are very much a part of the culinary experience. Once you’ve poured the brew into your glass, we urge you to give it a good look. Note the colour, consistency, and size of the head and any other physical features of your drink.

    1. Swirl

    The next step is to swirl your glass gently. Move the beer around the glass. No, you need not slosh it around, just a teeny tiny bit will do. This is to bring out all the subtle flavours, aromas and nuances of the drink. This test also checks for head retention. Does the head disappear or is it retained well?

    1. Smell

    Right after you have swirled your drink, the next step is to smell it. Take two sharp sniffs and then a regular sniff. The last sniff should be done with your mouth open.

    While doing this step, we recommend that you remain in an area without overpowering odours. As strong odours could interrupt the experience.

    The idea behind the sniff test is to take note of all the aromas. Look for strong as well as weak aromas. Try to articulate what you smell into words. Can you sniff coffee, chocolate, mint, etc.?

    1. Drink

    Now, this is the moment you have been building up to. Doesn’t your beer taste better, when you have been waiting for it? Go ahead, indulge in your drink. The only rule – don’t chug it all down. It ain’t a beer guzzling contest. Sip slowly, cherishing each mouth.

    1. Taste

    Take small sips. Don’t swallow it right away. Let the beer coat your tongue, the sides of your mouth and the top of your throat. Let it sit for a while so that your taste buds can pick all the flavours.

    Exhale the air in your mouth, via your nostrils. Then, swallow it slowly. Sip it like a connoisseur.

    1. Reflect

    This is the final step of the beer tasting journey. Take notes of what you felt. Open a notepad app on your phone and jot down your thoughts about the drink. You can even exchange notes with a friend.

    This step is essential if you want to become a beer tasting pro. Only by jotting down what you feel, you can improve your beer drinking experience. This will also prep you for future tastings. Create a personal database of your beer experiences, so you can compare and contrast it with other styles you come across in the future.

    This will help you identify your personal preferences. That’s it. You can now become a beer tasting pro.

    Tasting Lingo

    Here’s a snapshot of some of the popular terminologies used by beer connoisseurs.

    • Bouquet – This is the overall aromas and smells perceived in the drink. Other related terms include – nose and aroma.
    • Balanced – As the term implies, a beer that has all the main components balanced, with no single overpowering element is called a balanced beer.
    • Big – A beer heavy on the alcohol or flavour is termed as “big.”
    • Chalky – It refers to beer that tastes dry, powdery or dusty.
    • Finish – The flavours that are retained in your mouth, after you swallow the drink.
    • Head – The foamy head on top of the drink.
    • Lightstruck – A beer that’s exposed to too much light. It has a “skunky” flavour.
    • Mouthfeel – Just as the term implies, this refers to the feel of the brew in your mouth.
    • Opulent – A beer that is rich, well-balanced with a good texture and mouthfeel.
    • Round – Another term for a balanced beer.
    • Sessionable – A beer that has low ABV (Alcohol by volume) is called sessionable. These beers can be drunk for several hours, without the risk of passing out.
    • Thin – A beer that lacks flavour, complexity or body.

    Some Tips and Tricks for Tasting Beer

    • Look at the Dates – While purchasing beer at your local store, make sure to take a look at the “Bottled on” or “Best Before” dates. If drinking at a pub, you can ask your bartender for the date. Beers over three months old get funky. A month is the sweet spot for drinking beer.
    • Cellar with Caution – If you’re ageing beer, then you have to do it properly. Else, you run the risk of spoiling your beer. Take a look at our ageing guide that gives you all that you need to know about ageing
    • Try plenty of beer – Just like with everything else, “practice makes perfect,” when it comes to beers. The more styles of beer you taste and reflect, the more your tastes grow.

    Now, that’s some perfect advice right? (As if you needed an excuse to drink beer) Go ahead, and drink some beer!

  • 10 Killer Tips to Make Bottling Day a Massive Success

    10 Killer Tips to Make Bottling Day a Massive Success

    Bottling beer is indeed a tedious job, especially if you haven’t invested in a keg yet. In fact, most craft brewers dread bottling day! Worry not, here in this week’s post; we give you some of the best practices to make bottling day less tedious!

    Let’s get started.

    1. A Rinse in Time Saves Nine

    If you follow the practice of collecting bottles from your customers and reusing them (if you don’t follow this, you should start doing it soon – good for your pocket as well as the environment), then make sure to pour out leftover beer as soon as you receive the bottle. Give it a quick rinse with water before storing it.

    This simple habit will save you from scrubbing hard to reach nooks of the bottle on bottling day. Also, by pre-rinsing bottles, you prevent fungus or bacteria from growing inside. If you still aren’t convinced, we urge you to take a bottle that hasn’t been rinsed and show it in front of a light.

    Place your eye close to the mouth of the bottle, and peer inside like you use a telescope. Do you see tiny hairy things stuck on the insides of the bottle? These are fungi and bacteria. Yikes!

    After pre-rinse, store bottles upside down to drain the water and make it easy for bottling day.

    2. De label – The Easy Way

    Here are a few easy tricks to remove labels from beer bottles:

    • Soak

    Simply soak bottles in warm to hot water for around 30 to 60 minutes. Use a clean plastic bin for this, or you can even use a kitchen sink, with the plug fixed. Make sure that you don’t leave the bottles in the bin for several days together. This leads to fungal growth.

    • Scrape

    While some labels fall off easily, others don’t come off even after soaking. Use a glass scraper (this resembles a razor blade with a handle) and use it to peel off the labels easily.

    • Scrub

    Once the labels are off, use a regular kitchen utensils scrubber (Scotchbrite) to remove the remaining glue stuck to the bottle.

    For tough glue stains, spread vegetable oil on a kitchen towel, and vigorously press it to the sides of the bottle. Now, use the scrubber to remove the glue. Wipe off excess vegetable oil, with a clean kitchen towel.

    3. The Bottle Brush is your Ally

    If you have pre-rinsed your bottles, then this step is quite easy. Wash the insides of the bottles with a bottle brush. The brush helps to release sediments and simplifies the cleaning process. You can also use a “jet washer.” Think of the powerful hoses you use to clean your car.

    There are jet bottle washers made exclusively for bottle cleaning. This helps to flush out all the dirt, debris and sediments from the inside of the bottle.

    4. Sanitize, Sanitize and Sanitize Some More

    Make sure to dip your bottles in a high-quality sanitizing solution before you proceed to bottle. Even if the bottle appears clean to the naked eye, it isn’t. Only when you sanitize it, you remove all micro-organisms (fungi, bacteria) and other dirt from the bottle.

    5. Don’t Bottle Directly from the Fermenter

    Make sure to siphon your brew from the fermenter into a carboy (temporary priming bucket) before bottling. Minimize splashing the beer, by using a filter. Mix the priming sugar into the brew while it’s still in the priming bucket.

    This has two benefits – one, the priming sugar gets evenly mixed into the beer. Two – it reduces sedimentation in the bottle.

    6. Fining Agents Go Before Bottling

    Fining agents help to reduce sediments in the bottle as well as to clarify the brew. However, if you’re using fining agents, make sure to add them before bottling.

    If you’re using polyclad or gelatin, ensure that you add them to your brew five to seven days before bottling begins. This gives time for the excess yeast and proteins to settle.

    7. Invest in a High-Quality Bottle Capper

    If you have the bad experience of using a cheap bottle capper, then we’re sure that you would know the reason for this trip. Poorly made bottle cappers not only make the entire process time-consuming and frustrating but even could damage the taste of your brew. Improperly sealed bottles oxidize and spoil the flavor of your brew.

    So, spend a bit extra and splurge on a high-quality bottle capper. Remember, a bottle capper is not expenditure but an investment.

    8. Fill Bottles to the Brim

    Bottles need the right amount of headspace (the air column above the liquid) for proper carbonation and to generate the right amount of pressure. The general rule of thumb is to leave around 1 to 1 1/2 “headspace for proper carbonation.

    9. Store bottles the Right Way

    After you have capped the bottles, make sure to store them at the right fermentation temperature for at least two weeks. The right temperature plays a crucial role in proper fermentation. Once fermentation occurs, you can move your bottles to a cool dark place, away from direct sunlight.

    To quicken the process of clearing the liquid, you can opt for laagering. Here, you store the brew in the refrigerator to accelerate the clearing process.

    10. The Procrastination Technique

    Very often brewers do bottle cleaning and sanitization on one day and the actual bottling (filling the pre-cleaned bottles with the brew) on another day. This makes the job easy to manage.

    But, how do you ensure that your bottles stay clean till bottling day? Simple, place all your sanitized and dried bottles in a cardboard box and cover the mouth of each bottle with plastic cling wrap. Close the cardboard box and store it in a safe place.

    This way, your bottles stay clean and are ready for use on bottling day.

    Do you have any other helpful bottling hacks? We’d love to hear them and our other bottlers would too! Feel free to pipe in your comments below.

    Cheers and Enjoy Bottling!

  • Top Ten Steps to Better Beer

    Top Ten Steps to Better Beer

    Get Closer to Attaining Brewing Perfection

    Newbie brewers are often lost in the sea of information out there. One article says that barrel ageing is the best thing that you could do to improve the tastes of your beer, while another random internet article says just the opposite.

    With so much conflicting information out there, whom do you trust? Worry not, fellow brewers. Here in this week’s post, we give you the top ten tips for brewing better beer. Here, at Microbrewery India, we really wish someone had given us this list, way back when we were just getting started in the vast, wide world of brewing.

    Luckily for you, you’ve got the list right at hand. Make use of this list and improve the taste and flavor profile of your drink.

    Let’s get started.

    1.  Always use High-Quality, Fresh Ingredients

    Working with stale or poor-quality ingredients is a sure-fire way to failure. How can you expect your final drink to taste good when you don’t start with the right ingredients?

    Fresh and high-quality ingredients are a must for the best outputs. If you are currently using dry yeast, then you try switching to liquid yeast. If you’re an extract brewer, then make sure to use a fresh extract instead of relying on an old canned extract that has been lying around for several years.

    Make sure to follow the right storage procedures for brewing ingredients – the yeast goes in the fridge, hops in the freezer and the grains in a cool, dry place. Remember that hops, malt (both liquid and dry), yeast and crushed grains all come with limited shelf life and must be used well before they expire. Malt and crushed grains, when exposed to air (for a long time) oxidize thereby producing sub-par results.

    2. Do your Homework

    Beer brewing is both an art as well as a science. Why take guesses on the science part, when you could get it all figured out to a T? Before you start brewing make sure to spend some time on research – read brewing books, engage with other brewers at online communities and other discussion forums, learn the different styles of beers, the differences in brewing styles, look up recipes and more.

    In short, arm yourself with sound theoretical knowledge before you start experimenting. Remember that to attain brewing perfection; you need to brush up on your beer knowledge along with running various trials and experiments.

    3. Keep it Clean

    Make sure that your beer brewing equipment is perfectly clean. Anything that comes in touch with your brew once it has started cooling must be cleaned and sanitized with iodophor or bleach. Pay extra attention while your brew cools down. This is because – bacteria and other infections are likely to attack your beer during this stage before the yeast has started fermenting.

    4. Cooldown the Wort Quickly

    By cooling wort quickly, you reduce the chances of the fallout of tannins and proteins, both of which are bad for the final brew. This also helps to reduce the likelihood of a bacterial infection. Invest in an immersive wort chiller. This helps to improve the quality and clarity of the final brew.

    5. Boil the Wort for at least 60 to 90 minutes

    Boiling the wort helps in several ways. It:

    • Sterilizes the wort
    • Releases bitter oils present in the hops
    • Vaporizes any undesirable compounds present in the wort
    • Coagulates tannins and proteins from the grains, so that they fall out during the cooling phase

    To ensure that you achieve all these, make sure to boil the wort for at least one hour. For lighter beers, you can even boil long up to 90 minutes.

    6. Control the Temperature of Fermentation

    During fermentation, it’s essential that you maintain a consistent temperature. Few brewers use dedicated fermentation fridges for this purpose. They have a separate refrigerator used exclusively for beer fermentation.

    If you cannot afford to invest in a fermentation refrigerator, worry not. Here’s another simple method – select a cool and dry area, preferably in a corner. Then wrap the fermentor securely using wet towels. Place a table fan before this setup.

    Make sure to wet the towels once every 12 hours or so. This way, you get to maintain a steady fermentation temperature in the range 18 – 20◦C.

    7. Use a Full Batch Boil

    If you have the habit of boiling your wort batch by batch, then you aren’t getting the complete benefits of boiling the wort. Make sure that you boil the entire batch in a single step. If you don’t have a big brew pot, consider investing in one. Additionally, use a propane burner to help you boil at the right temperature.

    8. Invest in Glass Fermenters

    When compared to the commonly used plastic bucket, stainless or glass fermenters work better and offer added benefits. Here are the top benefits of using a glass fermenter:

    1. It’s easier to clean and sterilize when compared to plastic.
    2. Stainless steel or glass provides a complete barrier to oxygen. On the other hand, plastic buckets are often porous and can leak oxygen, if used for long periods.
    3. Plastic fermenters come with leaky seals that leak at both ends, making it difficult to pinpoint accurately, whether fermentation has come to a stop.

    9. Switch to a Yeast Starter

    By using a yeast starter, you not only accelerate the process but also ensure that the beer ferments properly. Here’s how to use yeast starter – boil a small quantity of dried malt along with ¼ oz of hops in a quart of water. Cool this solution well. Then put your yeast in it. Let it sit for around 2 to 3 days before you start brewing.

    Place this solution in an airtight plastic container and keep it stored in a cool, dark place. On the day of brewing, use this yeast starter solution, to accelerate the process and to reduce chances of infection.

    10. Always invest in Long-term Purchases

    When it comes to buying specialized brewing equipment, make sure to think long-term. While a small brewing pot may be sufficient to meet your present needs, buying a bigger brewing vat could be better in the long term, as your brewing quantity increases.

    When we were just getting started with brewing, we initially purchased a 3-gallon pot, then move to a 5-gallon one, next to an 8-gallon enamel pot before finally moving to a 9-gallon stainless steel pot. It would have been definitely cheaper to buy the 9-gallon pot directly, instead of all these changes.

    So, make sure to invest in high-quality brewing equipment that will last you for years. This helps you cut down expenses in the long run.

    And, for any queries/doubts on brewing equipment, don’t hesitate to give us a ring at +91-98-1123-3358/+91-98-1119-6262/+91-99-2043-2056. Our expert brewers will help you get started.

  • What is Beer Brewing Software and Why it Makes Sense to Invest in One?

    What is Beer Brewing Software and Why it Makes Sense to Invest in One?

    Automate Routine Calculations & Brew Great Tasting Drinks Every Time

    Not many brewers are aware that there is plenty of brewing software to help them in their brewing adventures. Yes, just like for all other purposes, there are specially made software to help you improve the quality and consistency of your brews.

    Brewing without focusing on the math is sorta like shooting in the dark. With brewing software, your results get better and consistent.

    In this week’s post, we take a look at the common features of beer brewing software and the reasons why you should invest in one.

    Here are the Top Benefits of Using Beer Brewing Software

    1. You can design Great Beer in just a Few Minutes

    Building a beer recipe from scratch manually is indeed a time-consuming and laborious task. With beer brewing software, you can try different permutations and combinations of various ingredients. You can play around with the ingredient quantities until you get the perfect recipe.

    When it comes to choosing ingredients, you can choose anyone from the plenty of beer ingredients available on the list. Typically, all beer brewing software comes with hundreds of varieties of grains, hops, yeast and more.

    All these are pre-entered and are part of the software package. All you have to do is play around with the ingredient list, go with your intuitions, alter quantities till you are satisfied.

    2. Enjoy Consistent Results with Every Batch you Brew

    One of the biggest woes plaguing brewers is inconsistency. You may have brewed a great batch. The next time you try to replicate it, the results are all over the place.

    Put an end to inconsistency by tracking all the ingredients you use in the recipe accurately. Since the software has a visual record of all the ingredients used and the brewing process, you can easily replicate recipes.

    Additionally, you can also track old recipes, see how various changes alter the bitterness, gravity, and color of the final brew. This is essential if you want to improve your brewing skills over the years.

    3. Brew any Beer Style

    In a brewing software, you start by deciding the style you want to brew. You can choose from hundreds of brew styles, including the most popular ones to obscure styles. Then the software suggests ingredients so that you can match the ABV, bitterness, and color of your brew to fit the style you have chosen. This is a great way to ensure that you end up with the style you initially wanted to brew.

    4. Share and Read Recipes of other Brewers

    Most brewing software comes with special functionalities to help you share beer recipes with your fellow brewers. What more, you can also check out thousands of recipes posted by other brewers. You can then customize, refine and alter these recipes to suit your tastes and preferences.

    Most brewing software today comes with an exclusive section for beer recipes that let you an email, share and exchange recipes via several communication channels like emails, messenger apps and more.

    5. Get Instructions Every Step of the Way

    Once you have decided on a particular recipe, the software gives you detailed step-by-step instructions for brewing your drink. You need not worry, whether you have all the ingredients at hand, as you see all the required ingredients at the beginning itself.

    What more, since you have the entire process on hand, you’re less likely to make mistakes.

    6. Stay Organised

    One of the biggest handicaps of a majority of brewers is that they are highly disorganized. They don’t maintain meticulous records of their techniques and recipes. The result, they end up making the same mistakes over and over again or produce inconsistent results.

    With a brewing software, all your records are stored in one place. You can even schedule your next brewing session, view the logs of your past brewing sessions, record new ideas for beers and so on. Think of it as your virtual whiteboard that has all your recipes, ideas, and feedback.

    7. Tailor your Recipes to Suit your Brewing Equipment

    With a brewing software, you can tailor the recipes to suit the equipment you have at hand. You can enter the equipment settings and apply that to your chosen recipe. This helps you improve the taste of your beer as you use accurate calculations, every step of the way.

    8. Manage Inventory and Cut Overall Costs

    Another biggest benefit of brewing software is that it lets you manage your inventory accurately. You can enter in the ingredient stock you have in hand, and even create shopping lists for your next batch. Additionally, brewing software helps you calculate the overall costs for each batch. This helps you to determine the right pricing for your brew.

    You can even set up alerts to indicate that a particular ingredient is reaching its expiry date. This prevents inventory loss and redundancy, thereby helping you cut down your overall expenditures.

    Finally, it’s Affordable

    Yes, high-quality brewing software is available in the market at pocket-friendly prices. What more, investing in a beer brewing software is just a one-time cost that pays for itself in the long run.

    Take your brewing hobby to the next level, with a professional brewing software to help you out. Do you use any brewing software? If yes, feel free to share your experiences with us.

    And, don’t forget for the A – Z of brewing, right from procuring high-quality brewing equipment to setting up your microbrewery, getting the required licenses, we are here to help you out. All you have to do is reach out to our team and we’ll set you up on your amazing brewing journey.

    We can’t wait to get started. Cheers!


  • Brewing Beer with Grains other than Barley

    Brewing Beer with Grains other than Barley

    A Look at how Various Grains impact the Flavour of the Brew

    Traditionally, barley is the main grain that is used for brewing beer. Even today, most brewers don’t use anything other than barley for their brews. But, several new-gen craft brewers today are experimenting with other grains.

    Beer critics often complain about the big-box breweries for mixing corn or rice along with barley as a means to reduce the brewing costs. This is because corn and rice are readily available and are cheaper when compared to barley.

    However, rice and corn aren’t just added to reduce costs. In fact, several breweries are today realizing that other “adjunct” grains add a unique touch to the overall flavor of the brew.

    To prep you for your next batch, here we’ve created a primer on brewing with other grains. Let’s take a look at how different grains impact the final flavor.

    1. Barley (Malted)

    One of the foundations of beer making is barley. Barley is turned into a brew-ready malt by immersing it in hot water. This process causes the grains to secrete an enzyme that transforms the starches and proteins into fermentable sugars. These sugars are further broken down by yeast to create alcohol.

    Barley malts are undoubtedly the biggest grain used in brew making. The reasons for this are many – barley contains husks, which help in keeping the mash (the liquid created by steeping the grains in boiling water) loose and allow for easy drainage of the wort. The wort is the liquid that finally gets converted into beer.

    When it comes to flavor, brewers mix the main grain barley with several other supporting grains like wheat and rye. While there are no defined standards for the classification of barley, it can be divided into the following categories:

    • Base Malts

    This includes the bulk of the grains used for brewing. They are generally light-colored, and these malts contribute the majority of the fermentable sugars, proteins, and minerals that are converted into alcohol.

    • Specialty Malts

    These are adjunct grains that are added for the following reasons – to improve head retention, increase the body, add aroma, color, and flavors like caramel, biscuit, chocolate, coffee, etc. specialty grains are blended with the base malts to create a unique flavor and character to the final brew.

    Some of the popular specialty malts include:

    Caramel (or Crystal) malts – These add extra sweetness to the brew. They are specially added to generate crystalline sugar within the hull of the grain.

    Roasted Malts – These are roasted or kilned at higher temperatures to impart specific flavors to the brew. Consider them as the coffee beans. They are roasted just like that.

    Dark Malts – These are highly roasted to impart intense flavors. They are mainly used for brews like black IPAs, bocks, Schwarz bier, stouts, etc.

    2. Un-malted Barley

    This lends a rich, grainy character to the brew. Unmalted barley is mainly used for brews like a dry stout. It helps in improving head retention. However, unmalted barley makes the final brew a bit hazier, like the Los Angeles smog.

    3. Corn

    When used in brew making, corn adds a smooth texture as well as subtle sweetness. It’s mainly used to stabilize flavor, decrease haziness and to lighten the beer’s body.

    4. Oats

    Oats are mainly used along with barley. When oats are used in brew making, it creates a brew that is as smooth as satin, with a full-bodied creamy finish. Stouts are generally made with oats.

    5. Rice

    When used as an ingredient in brew making, rice imparts no to little flavor. Instead, it helps to enhance the snappy flavors as well as adding a dry profile to the brew. Rice also helps in lightening the beer’s body.

    6. Rye

    When used along with barley, rye helps to sharpen flavors, add complexity to the brew and imparts a subtle spiciness to the final flavors. Rye helps to make the brew crisp as well as in drying the body of the brew.

    Rye can also be roasted at high temperatures (kilning) to impart a caramel or chocolate flavor to the final brew. The one drawback of rye is that it’s hull-less. This means large amounts of grain must be used in brewing which could cause the brew to clump up and become dense.

    7. Wheat

    Packed with proteins, wheat helps to create a rich mouthfeel, full body and a foamy head to the final brew. Brews brewed with wheat has a thick and stable foamy head. When the volume of wheat is more, it creates a hazy and smooth brew like a witbier or hefeweizen. One drawback is that wheat imparts a slight tartness to the final brew.

    Final Thoughts – Think Microbrewery India For A-Z of Brewing

    If you are passionate about brewing and would love to make a career out of it, reach out to our experts here at Microbrewery India. Our team has helped in setting up hundreds of successful breweries and brewpubs across the country. Right from importing quality brew making equipment to helping you procure the required licenses and more, we do it all. To get started give us a ring at +91-1123-3358 or drop in a line at rohit@microbreweryindia.com.